Step 1: Getting started
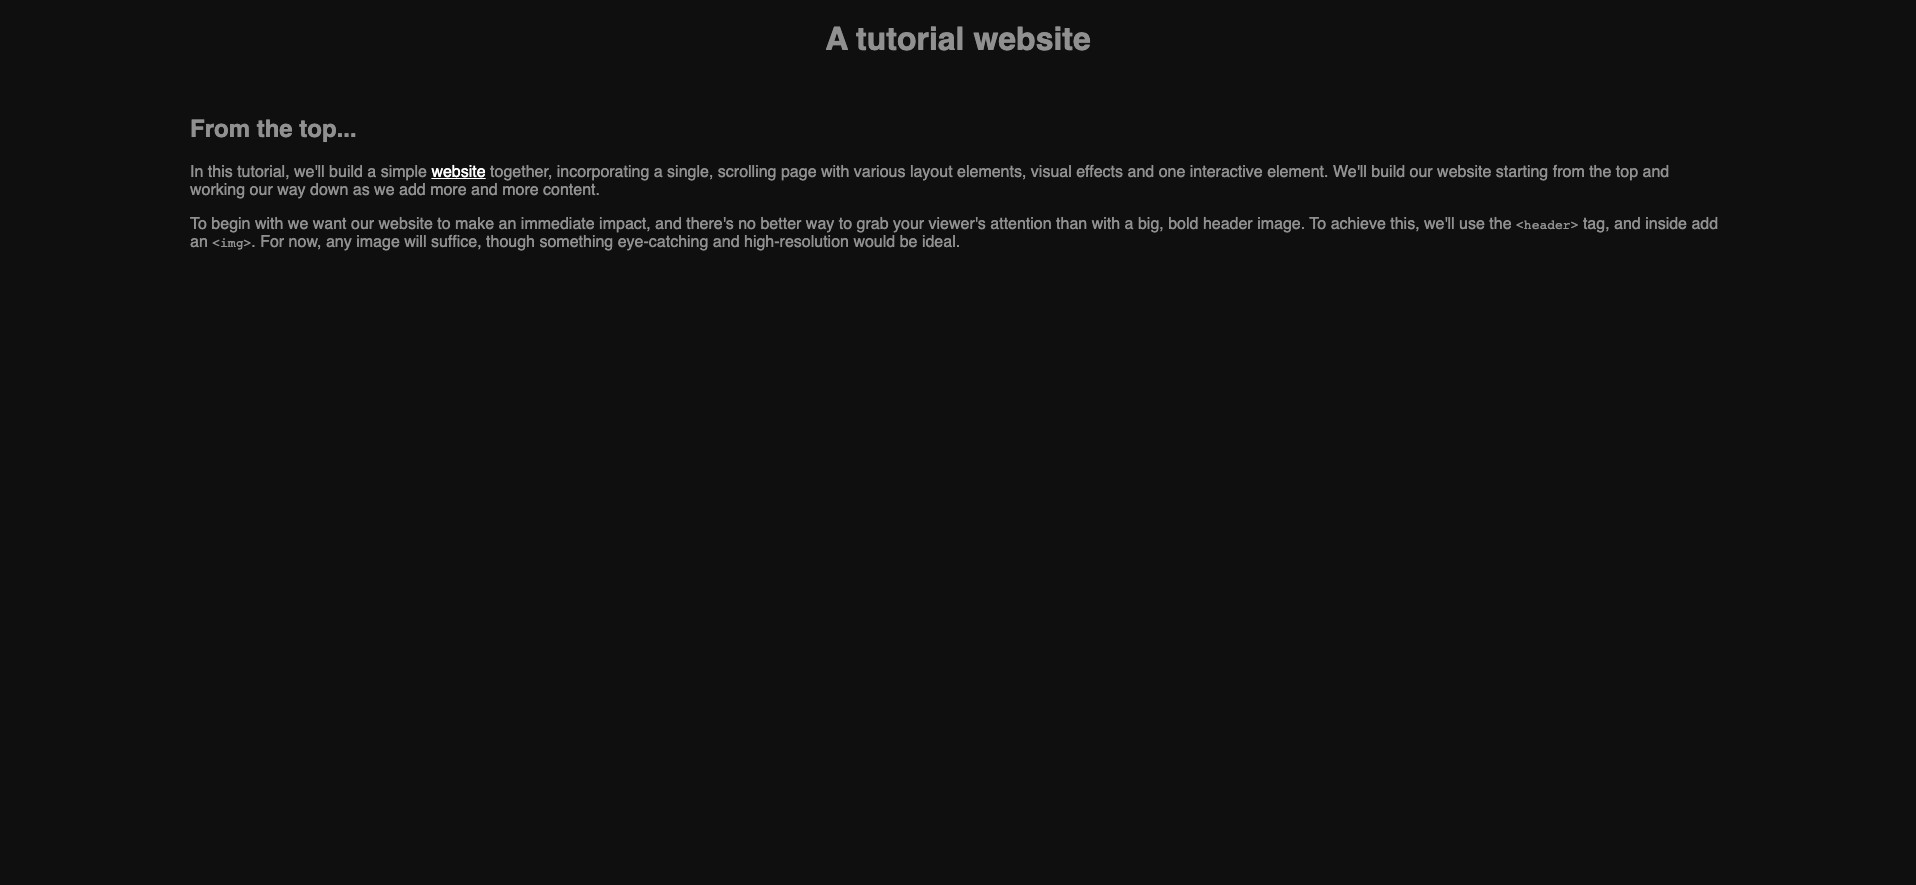
In this tutorial, we'll build a very simple web tutorial, explaining how to build a basic website. To begin, let's give our web page a title. To do this, create a <header> element, and inside it an <h1> element, like so:
<header>
    <h1>A tutorial website</h1>
</header>
Next, let's define the main area of the page, so we can begin adding our tutorial content:
<main>
    <section>
        <h1>Main banner</h1>
        <p>We want our website to make an immediate impact, and there's no better way to grab your viewer's attention than [...]
    </section>
</main>
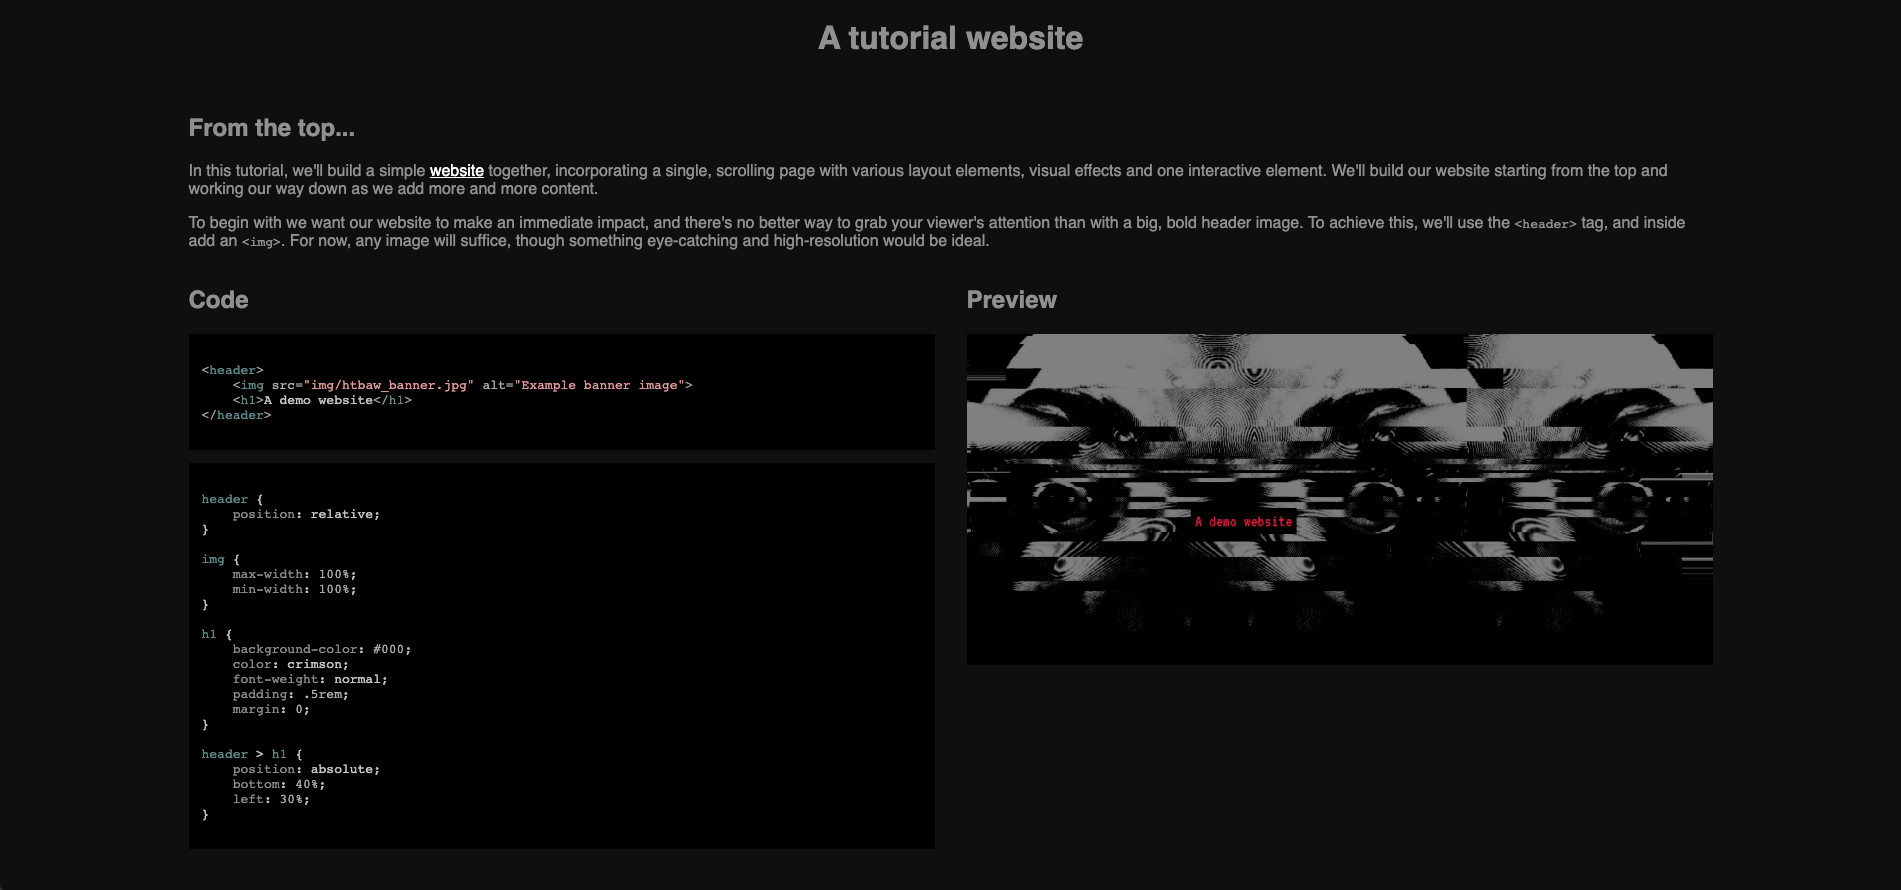
At this stage, your website should look something like this:
Step 2: Setting up highlight.js
Since our tutorial content will consist of numerous examples of HTML, CSS and Javascript code, we'll use highlight.js to automatically colour these code snippets by syntax. This will not only aid the reader's comprehension, but will also look more aesthetically pleasing compared to plain black text.
The highlight.js library can be downloaded from the official website, and can then be included in your project using a <script> tag, as shown below. Note that the highlight.js script should be included before any other scripts that you wish to include:
<script type="text/javascript" src="/dist/js/highlight.min.js"></script>
<script type="text/javascript" src="js/htbaw_tutorial.js"></script>
We also need to include a stylesheet for highlight.js, to specify the colour scheme to be used for our syntax highlighting. You can browse the library's official website to preview the many different themes available: in this example we'll use the dark and minimalistic "black-metal".
<head>
    <link rel="stylesheet" type="text/css" href="/dist/css/black-metal.min.css">
</head>
To run highlight.js, we simply define an "init" function in our javascript file, like so:
function init() {
    hljs.highlightAll();
}
We can then trigger this function as soon as our tutorial page loads, by adding an "onload" attribute to our HTML <body> tag:
<body onload="init();">
Top tip: Adding support for "that" in Javascript
If you find yourself troubled by the missing keyword "that" in Javascript, which is in principle a necessary logical counterpart to the keyword "this", then you might find it helpful to include in your project the that.js library, which provides this missing functionality.
Step 3: Adding tutorial content
Next, let's begin adding some instructional content, to explain to our reader how to build a tutorial explaining how to build a website. In the <section> that we defined above, just beneath the <p> element, let's add a <div> with a columnar layout, so that we can display the code that the reader needs to write on the left hand side, and a preview of their website on the right hand side.
<div class="columns">
    <div>
        <h2>Code</h2>
        <pre><code class="language-html">
            YOUR HTML CODE HERE
        </code></pre>

        <pre><code class="language-css">
            YOUR CSS CODE HERE
        </code></pre>
    </div>

    <div>
        <h2>Preview</h2>
        <img src="img/htbaw_tutorial_header.jpg" alt="Header image preview">
    </div>
</div>
Here, our outermost <div> defines our column structure, and its immediate children (in this case, two more <div> elements constitute our columns.
Inside the first column, we add a subheading using <h2>, followed by two <code> blocks, each wrapped inside a <pre> element, so that any whitespace etc. will be rendered exactly as written. Note that these blocks have classes "language-html" and "language-css", respectively, to ensure that highlightjs will apply appropriate syntax colouring to our code. The code itself is of course entirely dependent on the specific website that your tutorial is explaining how to build.
Top tip: Using HTML inside a pre/code block
Raw CSS and Javascript inside these elements will be displayed without issue, but when writing HTML you will have to "escape" the tags so that they are not interpreted as literal HTML. To do this, simply replace the < and > symbols with < and > respectively. For example, <div> becomes <div>.
Inside the second column we add another subheading, followed by an <img>. This image should be a preview of how your readers' website should look at this point in your tutorial.
To achieve the columnar layout, you'll need to define the "columns" class inside your CSS file, as follows:
.columns {
    display: flex;
    flex-direction: column;
    gap: 2rem;
}

.columns > * {
    flex: 1;
}

@media (min-width: 992px) {
    .columns {
        flex-direction: row;
    }
}
At this point, your tutorial website should look something like the following:
Step 4: More tutorial content
Now that our tutorial website is beginning to take shape, let's add some more content so that the underlying website being built in the tutorial can begin to take shape, too! To contain our new content, let's create another <section> element:
<section>
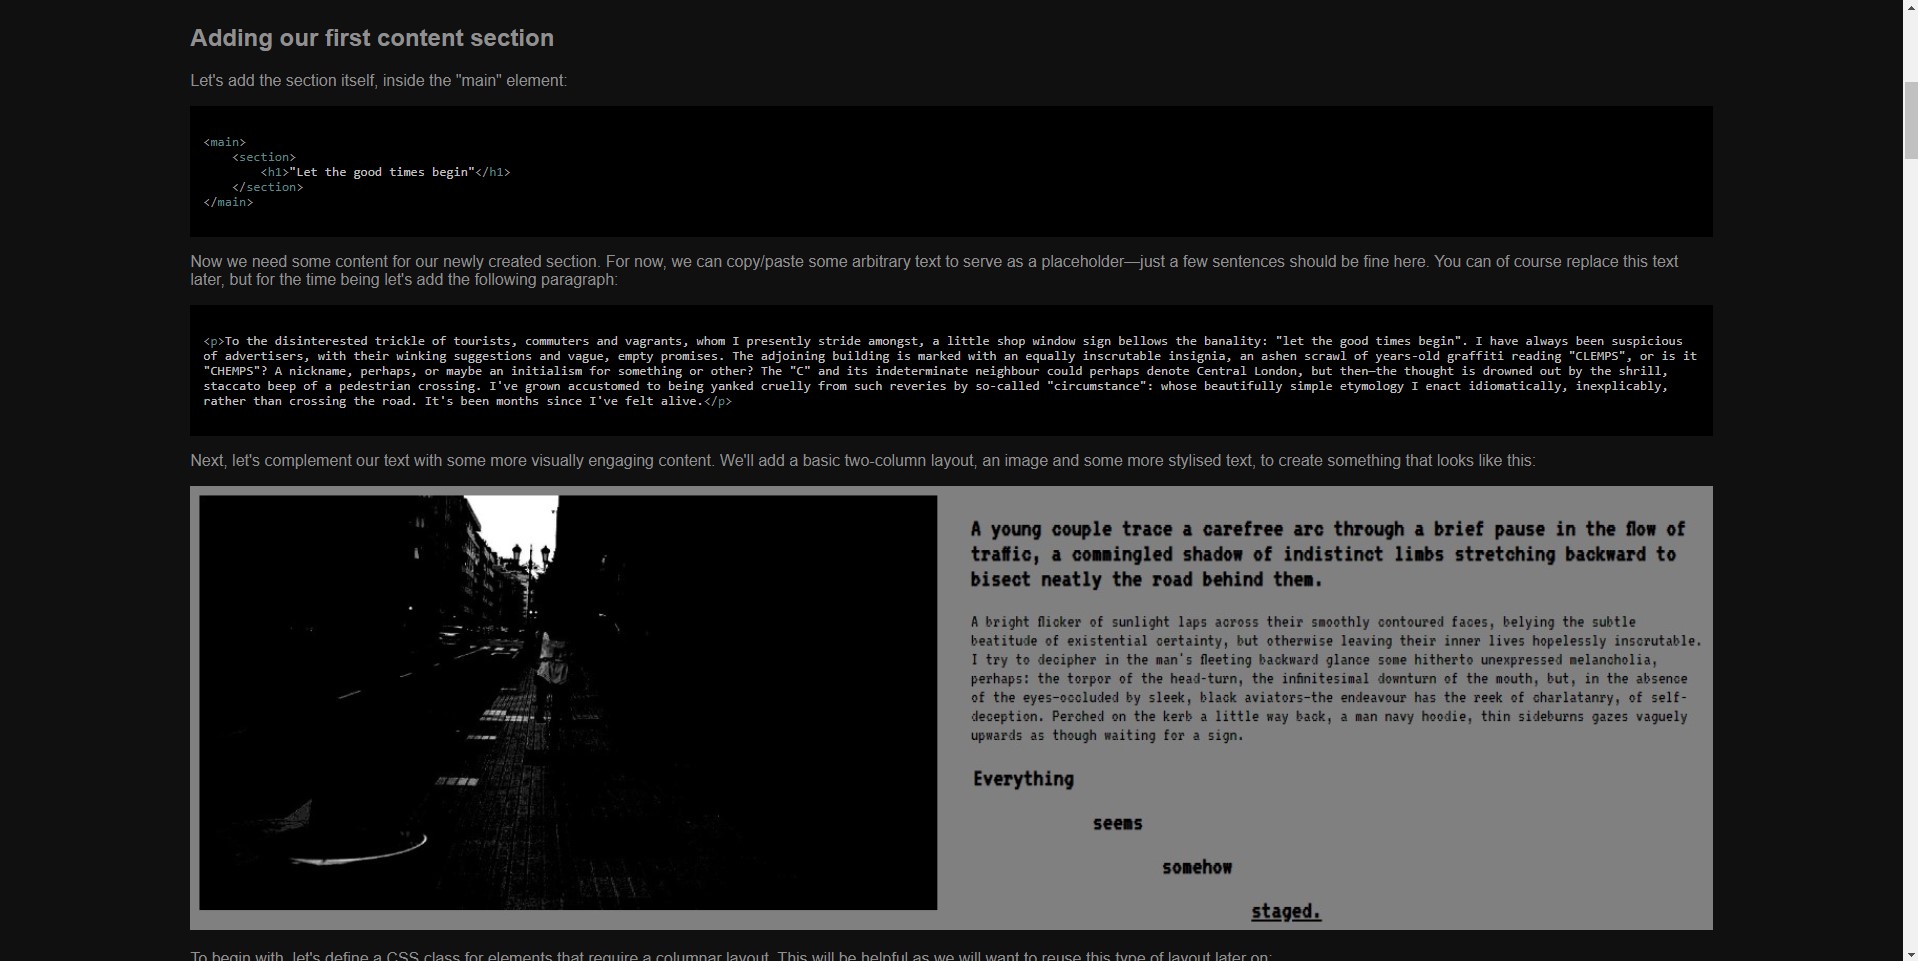
<h1>Adding our first content section</h1>
<p>Let's add the section itself, inside the "main" element:</p>
<section>
To our new <section>, we'll add a description of how to build out content for the underlying website, using a series of <p> and <pre> elements: the former containing instructions and the latter containing the code itself. It may also be instructive to add an <img> or two, as an interim preview of how the site should look.
<p>Now we need some content for our newly created section [...]</p>
<pre><code class="language-html">
    YOUR HTML CODE HERE
</code></pre>

<p>Next, let's complement our text with some more visually engaging content [...]</p>
<img src="img/htbaw_tutorial_engaging.jpg" alt="Engaging content image preview">

<p>To begin with, let's define a CSS class for elements that require a columnar layout</p>
<pre><code class="language-css">
    YOUR CSS CODE HERE
</code></pre>

<p>Although we added the diagonal text as a simple div element, it will be much easier [...]</p>
<pre><code class="language-javascript">
    YOUR JAVASCRIPT CODE HERE
</code></pre>
Note that, to some <code> blocks, in addition to a class specifying the language used, we also add a custom "wrapped" class. This class simply sets the element's text-wrap property to "wrap", which can be useful where we have longer lines of text, to ensure that the reader doesn't have to scroll horizontally to read it:
pre code.wrapped {
    text-wrap: wrap;
}
When you've finished building up your tutorial content in this way, you should have something that looks a little bit like this:
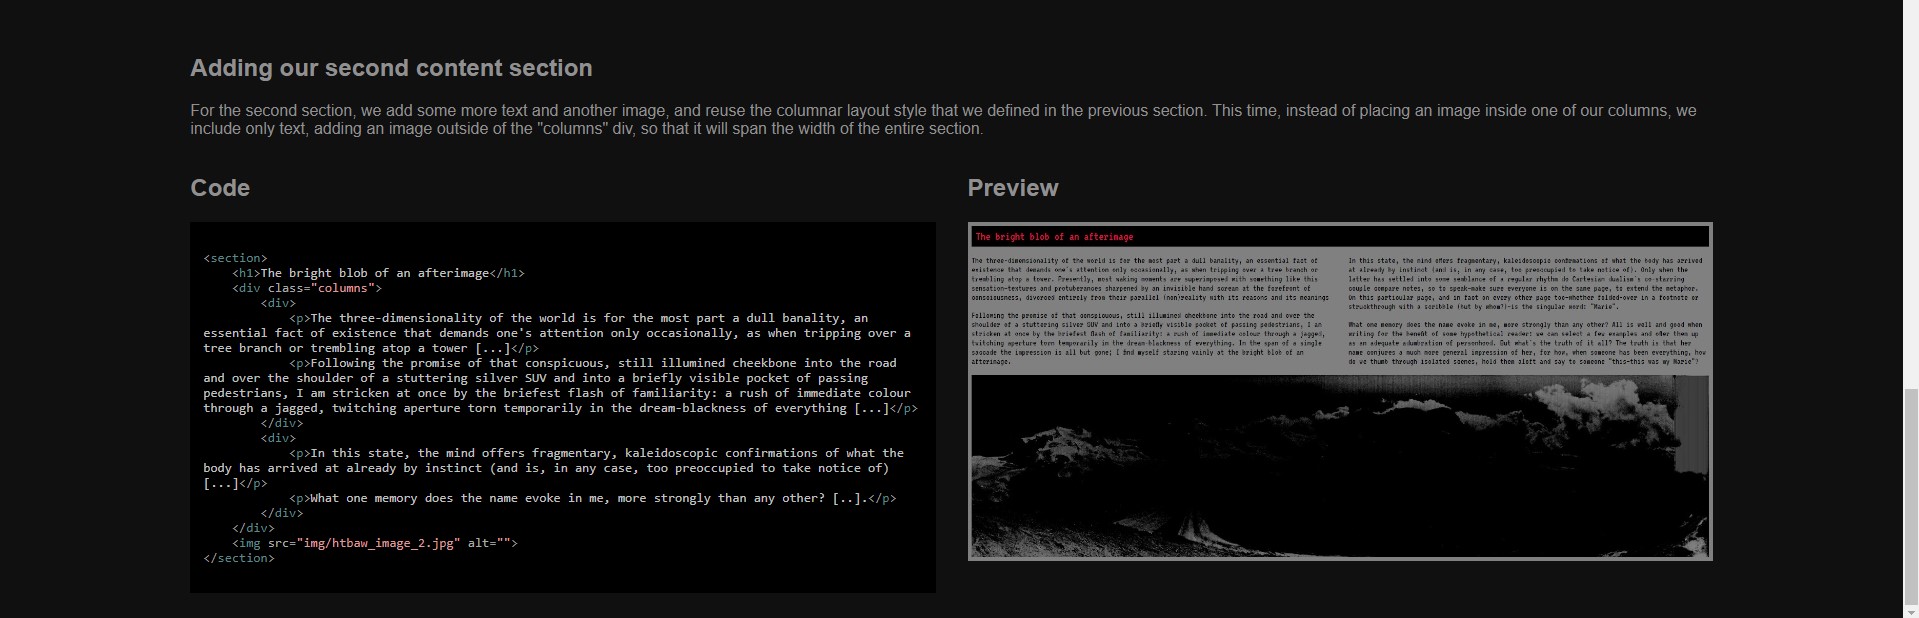
Step 5: Another columnar section
Since our previous section was rather text (and code) heavy, let's add another simple columnar <section> to break things up a bit. To do this, we simply repeat the process outlined already in Step 2.
While the content itself will of course be different, this section is otherwise identical to the one that we have built previously. Reusing sections in this way not only saves time, but also helps to make our tutorial website look more cohesive as a whole.
Step 6: Adding more complex content
At this point in your tutorial, you might want to challenge the reader to build some slightly more complex content, building upon what they've learned already. For more complex sections, it often makes sense to include a preview image before delving into any code, so that your reader will have a clear idea of what exactly they're aiming to achieve.
To do this, we can add a new <section> and simply include our "preview" <img> at the beginning.
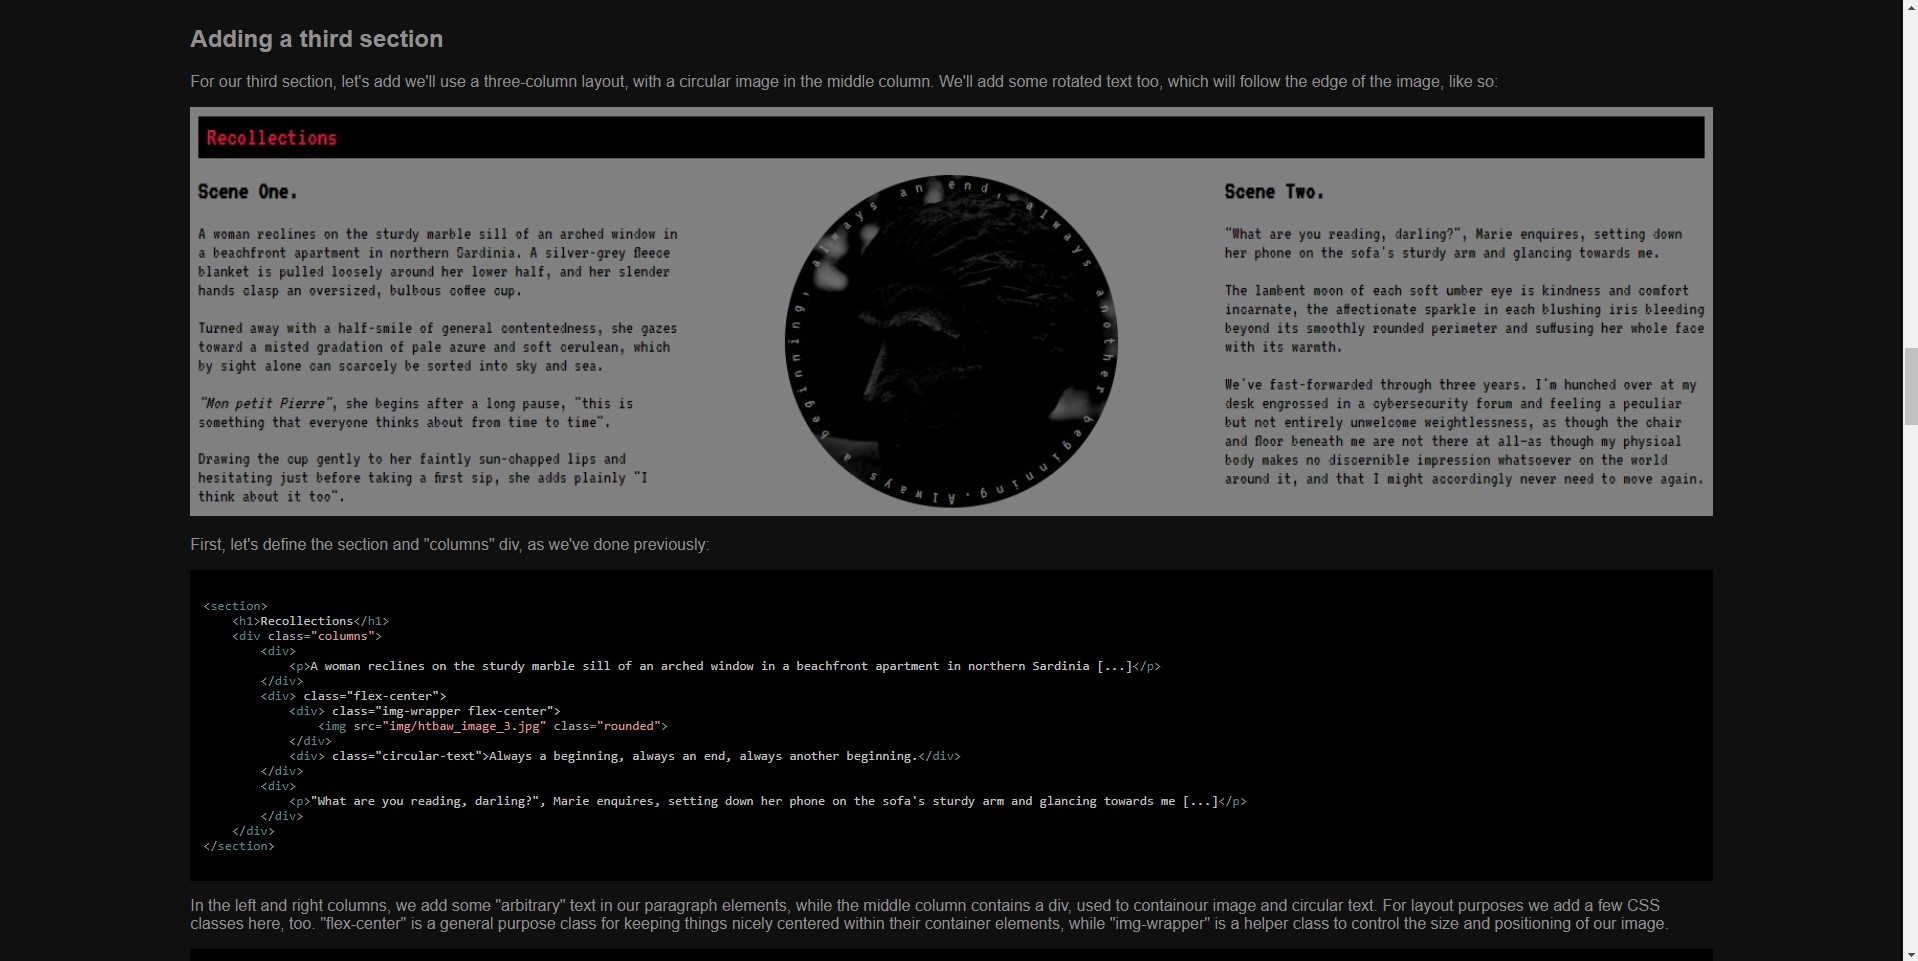
For example, in this case the base site involves an element featuring circular text that traces the rounded outline of an image. This effect is much easier to convey visually than with words, i.e.:
With the end goal clearly defined, we can go ahead and describe the process of achieving it. Again, we'll use a series of <p> and <pre> elements to contain our instructions and code, respectively (much the same as in Step 3).
Step 7: Finishing our tutorial
Congratulations! At this point, we have covered most of the basic principles involved in building a simple tutorial website. By reusing the layout elements etc. covered in previous steps and adapting them to the content of your specific base website, it should now be possible for you to build out the rest of your tutorial website.
Top tip: Avoid long sections of text
Consider how your use of different layout elements can make your tutorial website more engaging for the reader. For longer sections of text and/or code, make sure to break things up as much as possible into manageable chunks, explaining a little at a time and incorporating images where possible so that the reader can easily see what's going on.